What Is the Best Way to Clean a Mini Split?
Just like a normal air conditioner and furnace, mini splits require routine maintenance.
Keeping your mini split ductless system clean is vital to its lifespan as it works all year round to heat and cool your home.
Regularly scheduled maintenance is the best way to guard against expensive repairs that could arise when the system is not maintained.
The frequency of cleaning required largely depends on how often you use the system and what kind it is (single zone, multi-zone, ceiling, wall-mounted etc.)
Also, the overall efficiency of your system largely depends on how clean the unit is as well.
A ductless system covered in dirt and other debris will not operate as efficiently and cost more in energy as opposed to a clean unit.
There really is no substitute for having your mini split cleaned and inspected by a professional HVAC contractor, but here is a basic step-by-step process of how you can clean the unit yourself.
1. Make Sure the System Is Turned Off

The most logical place to start the cleaning process is to make sure your mini split is turned off.
For safety purposes, you will want to verify the power is off to the unit at the circuit breaker panel as well.
Be sure to unplug any power cables that may be running from the unit as well.
2. Cleaning Materials Needed

Having the right materials will making cleaning your ductless system much easier.
Most of the materials needed to clean a mini split can be found at your local hardware store.
Common items required include water, both damp and dry cloths, gloves, a shop vacuum and household cleaners. If you check your systems user manual, it should suggest products to be used for cleaning purposes.
Further products that you can purchase to enhance the cleaning process include fin combs, an HVAC coil cleaner and condensate drain cleaners.
Having a professional grade coil cleaning tool like the one just mentioned will give you a deeper clean than just spraying the outdoor coil off with a garden hose.
Unlike a pressure washer, an HVAC coil cleaning tool delivers the correct amount of pressure needed to clean the coils while not damaging them. This tool also splits up the water and chemicals into two separate tanks.
Here is a quick video of what a coil cleaning tool can do for you:
3. Cleaning the Outdoor Unit

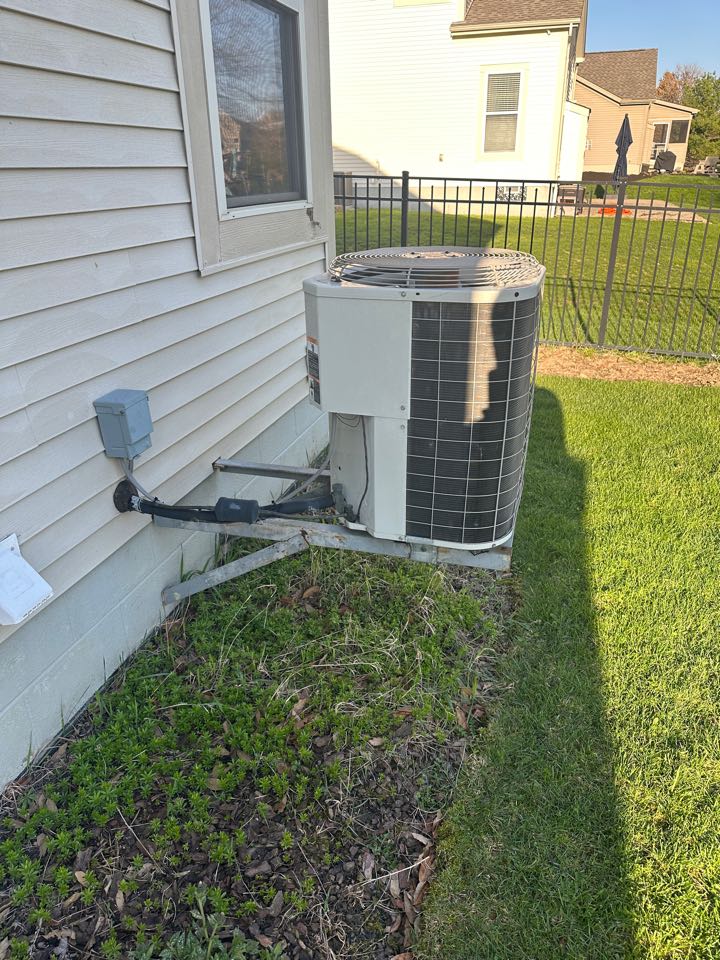
Starting at the outdoor condenser unit, begin by looking over the unit for any loose screws or other parts that may have become loosened over time and tighten them back up.
If any parts have broken off, it may be best to stop and call your local HVAC company to come and take a look. Attempting to fix something you are not familiar with may void the unit’s warranty.
Next, remove any grass, leaves or twigs that may have found their way into the unit.
After you have removed the large debris, spray down the outdoor unit with your hose or coil cleaning tool and wipe it down to remove any dirt build up on the unit’s housing.
Carefully scrub the the grill and fan cage (not the metal fins themselves!) of the unit taking care to not bend any of the condensers fragile metal fins on the inside.
The cleaning of the coils themselves should be done with only coil cleaner and a hose.
If you have a fin comb, you can use this tool to carefully repair any bent fins during the cleaning process.
Attempting to scrub the condensing fins will result in damaging the unit.
Clean the exhaust fans of the unit with a damp cloth by removing the grille covering it. Dry them afterwards to prevent future rusting.
Take care to not damage the system’s line set as well during the cleaning process.
4. Cleaning the Indoor Unit

Carefully remove the plastic panel covering the indoor wall mounted unit. There is usually a plastic style of filter inside that can be removed and cleaned under a faucet.
Be sure to consult your user manual as some brands require a certain process to clean the filters.
Also, note how often this filter should be cleaned moving forward.
Remove the units cabinet to reach the evaporator coil. Carefully clean the coils removing all dirt and debris that has accumulated. Coil cleaner is the most effective chemical for this cleaning process.
Replace the covering panel and wipe down the outside of the unit with a damp cloth.
Clean the condensate pan and drain. Check for any mold growth or debris and remove as needed. You can flush these with soapy water or even better, bleach.
5. Finishing Up

After you have finished the cleaning process, double check that all parts have been reassembled correctly prior to turning the unit back on.
Take note in your user manual of how often your ductless system should be thoroughly cleaned.
The type of environment that the unit is operating in will be a large factor in determining it’s cleaning schedule.
Mini split systems are a great alternative to a normal HVAC system as they are very efficient. If you take care of them through routine maintenance, a ductless system can last for many years.


